Create New Project
Add/Delete Fields
Field Text Editor
Response Piping
Choice Fields: Multiple Choice, Linear Scale, Multiple Choice Table
Text Fields: Short Answer, Long Answer, Number, Table
Form Structure Fields: Personal Information, Section, Description, Image Description, Website
Data Fields: Location Record, Photo Capture, File, Video Capture
Contact Fields: Phone Number, Email, Address
Schedule Fields: Date, Time
Rejection Field
Enging Field
Logic
Quota Setting
Templates
Add/Delete Fields
✏️ A "field" refers to a space where a question or response can be entered.
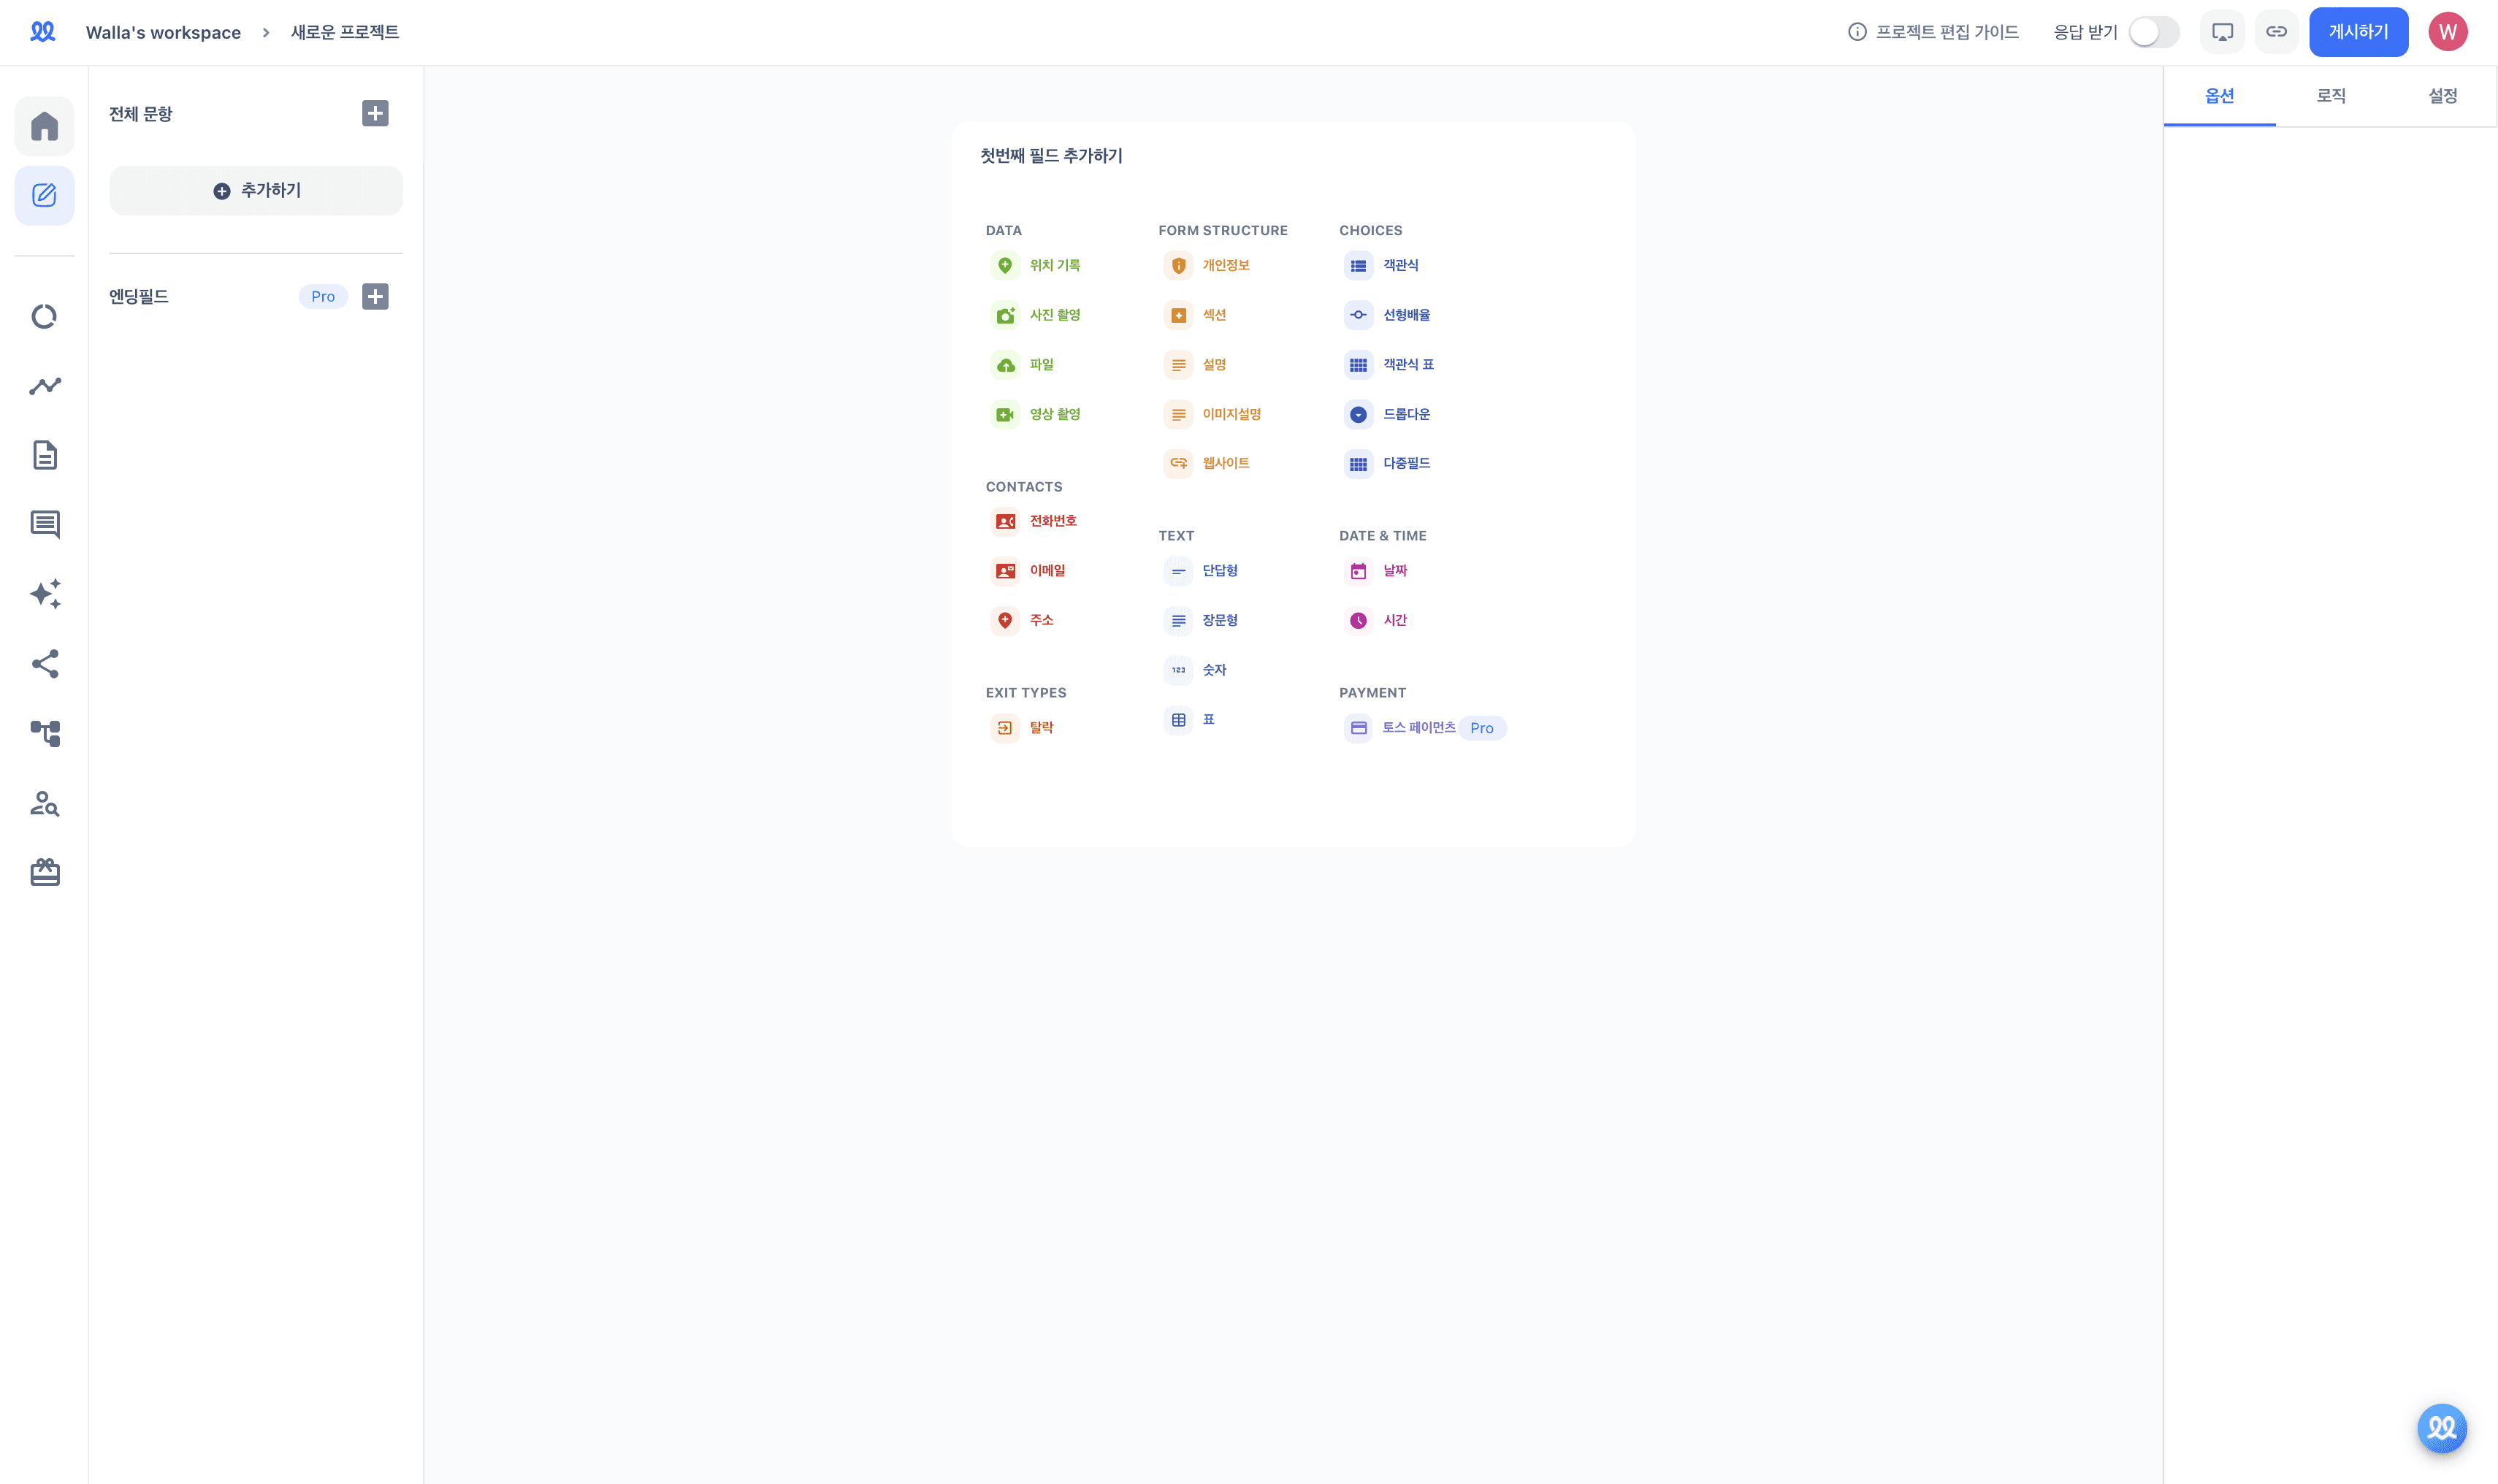
Add a field:
Add the desired field and write the question and description.
Through the "Response Verification" setting, you can customize the response type (number, text, length, regular expression) and error message.
With the "Response Type," you can specify the type of response that the respondent will enter.
In "Response Condition," you can set the conditions for the response.
In "Reference Value," you can specify the specific value for the "Response Condition" using text, numbers, or regular expressions.
In the "Error Message," you can write a warning message that will appear if the respondent's answer does not meet the set conditions.
📌 Here are some common response validation settings:
I want to set a response to be at least 30 characters long!
Response Type: Length
Response Condition: Minimum Character Count
Reference Value: 30
I only want to accept responses with numbers between 0 and 100 (exclusive)!
Response Type: Number
Response Condition: Range
Reference Value: 0 and 100
I want the response to always include the word 'apple'!
Response Type: Text
Response Condition: Contains
Reference Value: apple
전화번호는 중간에 '-' 표시가 들어가면 좋겠어요!
응답 유형 : 정규표현식
응답 조건 : 포함
참조값 : ^\d{3}-\d{3,4}-\d{4}$
📌 Here are some commonly used regular expressions:
Korean Name (2 to 10 characters):
^[가-힣]{1,10}$Postal Code (5 digits, Road Address):
^\d{5}$Email Address:
^[A-z0-9._-]+@[A-z0-9-]+\.[A-z]+$wuddj
Hyphen-separated format (e.g., 010-1111-2222) :
^\d{3}-\d{3,4}-\d{4}$Dot-separated format (e.g., 010.1111.2222) :
^\d{3}.\d{3,4}.\d{4}$숫자만 입력할 경우(ex. 01011112222) :
^\d{10,11}$
Birthday
YYYY.MM.DD :
^\d{4}.\d{2}.\d{2}$YY.MM.DD :
^\d{2}.\d{2}.\d{2}$YYYYMMDD :
^\d{8}$YYMMDD :
^\d{6}$
Share your completed project by clicking the 'Publish' button.
Delete a field
Hover over the field you want to delete in the field list.
Click […] to delete the field.
Select multiple fields
Hold down the 'Shift' key to select multiple fields.
Click the trash icon at the top right of the field list to delete the selected fields.
You can set a field as 'Required' on the right side of the project editing page.
You can set 'Page Break' for a field on the right side of the project editing page.
Create New Project
Add/Delete Fields
Field Text Editor
Response Piping
Choice Fields: Multiple Choice, Linear Scale, Multiple Choice Table
Text Fields: Short Answer, Long Answer, Number, Table
Form Structure Fields: Personal Information, Section, Description, Image Description, Website
Data Fields: Location Record, Photo Capture, File, Video Capture
Contact Fields: Phone Number, Email, Address
Schedule Fields: Date, Time
Rejection Field
Enging Field
Logic
Quota Setting
Templates
More Articles
Create Forms
Add/Delete Fields
✏️ A "field" refers to a space where a question or response can be entered.
Add a field:
Add the desired field and write the question and description.
Through the "Response Verification" setting, you can customize the response type (number, text, length, regular expression) and error message.
With the "Response Type," you can specify the type of response that the respondent will enter.
In "Response Condition," you can set the conditions for the response.
In "Reference Value," you can specify the specific value for the "Response Condition" using text, numbers, or regular expressions.
In the "Error Message," you can write a warning message that will appear if the respondent's answer does not meet the set conditions.
📌 Here are some common response validation settings:
I want to set a response to be at least 30 characters long!
Response Type: Length
Response Condition: Minimum Character Count
Reference Value: 30
I only want to accept responses with numbers between 0 and 100 (exclusive)!
Response Type: Number
Response Condition: Range
Reference Value: 0 and 100
I want the response to always include the word 'apple'!
Response Type: Text
Response Condition: Contains
Reference Value: apple
전화번호는 중간에 '-' 표시가 들어가면 좋겠어요!
응답 유형 : 정규표현식
응답 조건 : 포함
참조값 : ^\d{3}-\d{3,4}-\d{4}$
📌 Here are some commonly used regular expressions:
Korean Name (2 to 10 characters):
^[가-힣]{1,10}$Postal Code (5 digits, Road Address):
^\d{5}$Email Address:
^[A-z0-9._-]+@[A-z0-9-]+\.[A-z]+$wuddj
Hyphen-separated format (e.g., 010-1111-2222) :
^\d{3}-\d{3,4}-\d{4}$Dot-separated format (e.g., 010.1111.2222) :
^\d{3}.\d{3,4}.\d{4}$숫자만 입력할 경우(ex. 01011112222) :
^\d{10,11}$
Birthday
YYYY.MM.DD :
^\d{4}.\d{2}.\d{2}$YY.MM.DD :
^\d{2}.\d{2}.\d{2}$YYYYMMDD :
^\d{8}$YYMMDD :
^\d{6}$
Share your completed project by clicking the 'Publish' button.
Delete a field
Hover over the field you want to delete in the field list.
Click […] to delete the field.
Select multiple fields
Hold down the 'Shift' key to select multiple fields.
Click the trash icon at the top right of the field list to delete the selected fields.
You can set a field as 'Required' on the right side of the project editing page.
You can set 'Page Break' for a field on the right side of the project editing page.
More Articles
Create Forms
Create New Project
Add/Delete Fields
Field Text Editor
Response Piping
Choice Fields: Multiple Choice, Linear Scale, Multiple Choice Table
Text Fields: Short Answer, Long Answer, Number, Table
Form Structure Fields: Personal Information, Section, Description, Image Description, Website
Data Fields: Location Record, Photo Capture, File, Video Capture
Contact Fields: Phone Number, Email, Address
Schedule Fields: Date, Time
Rejection Field
Enging Field
Logic
Quota Setting
Templates
Add/Delete Fields
✏️ A "field" refers to a space where a question or response can be entered.
Add a field:
Add the desired field and write the question and description.
Through the "Response Verification" setting, you can customize the response type (number, text, length, regular expression) and error message.
With the "Response Type," you can specify the type of response that the respondent will enter.
In "Response Condition," you can set the conditions for the response.
In "Reference Value," you can specify the specific value for the "Response Condition" using text, numbers, or regular expressions.
In the "Error Message," you can write a warning message that will appear if the respondent's answer does not meet the set conditions.
📌 Here are some common response validation settings:
I want to set a response to be at least 30 characters long!
Response Type: Length
Response Condition: Minimum Character Count
Reference Value: 30
I only want to accept responses with numbers between 0 and 100 (exclusive)!
Response Type: Number
Response Condition: Range
Reference Value: 0 and 100
I want the response to always include the word 'apple'!
Response Type: Text
Response Condition: Contains
Reference Value: apple
전화번호는 중간에 '-' 표시가 들어가면 좋겠어요!
응답 유형 : 정규표현식
응답 조건 : 포함
참조값 : ^\d{3}-\d{3,4}-\d{4}$
📌 Here are some commonly used regular expressions:
Korean Name (2 to 10 characters):
^[가-힣]{1,10}$Postal Code (5 digits, Road Address):
^\d{5}$Email Address:
^[A-z0-9._-]+@[A-z0-9-]+\.[A-z]+$wuddj
Hyphen-separated format (e.g., 010-1111-2222) :
^\d{3}-\d{3,4}-\d{4}$Dot-separated format (e.g., 010.1111.2222) :
^\d{3}.\d{3,4}.\d{4}$숫자만 입력할 경우(ex. 01011112222) :
^\d{10,11}$
Birthday
YYYY.MM.DD :
^\d{4}.\d{2}.\d{2}$YY.MM.DD :
^\d{2}.\d{2}.\d{2}$YYYYMMDD :
^\d{8}$YYMMDD :
^\d{6}$
Share your completed project by clicking the 'Publish' button.
Delete a field
Hover over the field you want to delete in the field list.
Click […] to delete the field.
Select multiple fields
Hold down the 'Shift' key to select multiple fields.
Click the trash icon at the top right of the field list to delete the selected fields.
You can set a field as 'Required' on the right side of the project editing page.
You can set 'Page Break' for a field on the right side of the project editing page.


Paprika Data Lab Inc.
Services


Paprika Data Lab Inc.
Services
Paprika Data Lab Inc.
Services
